Tuesday, December 27, 2011

Minced Fruit Pie

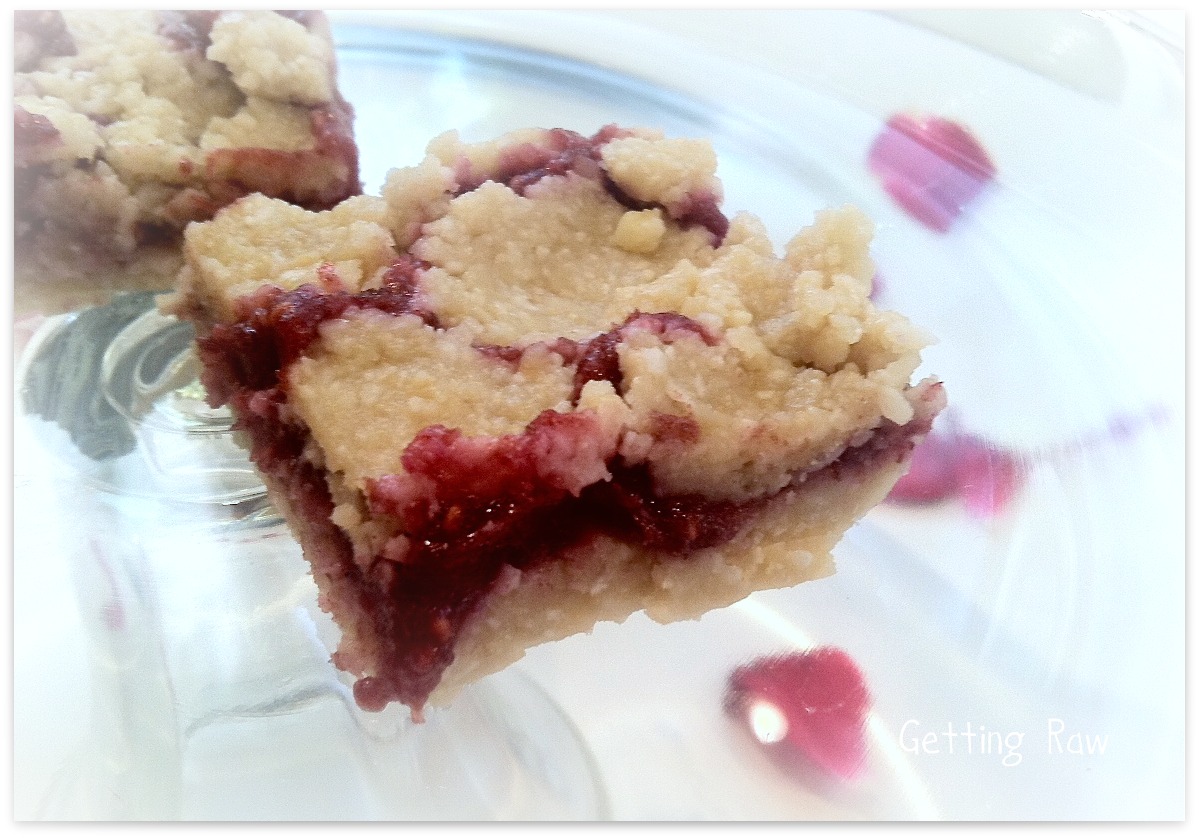
Raw Minced Pie with Cashew Cream
Traditional Christmas Pie, Minced Pie, Mincedmeat Pie, Mutton Pie, Spiced Fruit Pie, whatever you call it, this holiday delicacy has its origins dating back to the 13th century and has stayed around for good reason.  It was said that the crusaders brought back the culinary concept of mixing spices, meat and fruit together from their ventures to the Holy Land in the middle east. It's become a British holiday staple ever since and even has a following here in the states.

Today even though they are still called mincemeat pies, most are no longer made with meat. To be honest, the name "mincedmeat pie" was always a deterrent I could never get past so I never really wanted to try it. But for Rich the holidays just aren't complete without minced pie. With his birthday following Christmas I have always made an attempt to get him one of these pies for his "birthday cake" that he could eat all by himself and he's enjoyed this tradition. Yet it's getting harder and harder to find.

This year I looked into what exactly goes into minced pie and discovered that a mix of dried fruit and spices in a pastry crust sounds like a perfect recipe for a raw version. I combined a few ideas and with Rich taste testing as I went, we have come up with a fantastic little pie filling!

It really tastes like a richly spiced apple pie!

If you have never had minced pie or even if you have, you owe it to yourself to try this new recipe. It really is tasty and is a perfect pie for fall and winter, not just the holidays.

Russell James' recipe for individual minced pies are all over the web this year and while I usually love all his recipes, and was anxious to try this one because of rave reviews, trying to make this into a single pie did not work out well for me. The crust tasted like uncooked flour probably because of the use of oat flour even though I dehydrated it until well dry. Plus luckily I checked to see if I would be able to get it out of the pie pan when serving before I adding the filling. I couldn't. I had to just wash it all down the drain and even with water it was hard to remove. I really hate that! 

But since I was on a mission to make this birthday treat, I continued with another experiment and I'm glad that I did.

This one does not need a dehydrator so it's more simple and it's quite tasty. The filling is also a little different as I wanted to incorporate a rich mix of fruit flavors. I hope you enjoy!

Raw Minced Fruit Pie

Minced Fruit Pie


For Crust:

2 cups of almond meal (almonds ground to flour)
1/2 cup dried unsweetened coconut flakes
1/3 cup raisins (I used golden raisins)
1 tsp cinnamon
1 tsp salt
1/4 cup coconut oil- liquid

Grind the almonds into a fine meal in the food processor or you can sometimes find almond meal in the stores. Add in the coconut, cinnamon and salt and pulse a few times. Add in the raisins and pulse until it is slightly sticky. Add in the oil and pulse until it is mixed through- but be careful to not over mix! It should just stick together between your fingers at the right consistency.

Press into tart or pie pans. You may want to use cling wrap or parchment first if it does not have a lift up bottom to make it easier to remove. I used a tart pan with a removable bottom and that worked out nicely when chilled until set. When ready for filling remove crust from tart pan if using or leave in pie pan.

Raw Pie/ Tart Crust after setting up in tart pan

Note: If you plan to make the cashew cream topping, now would be a good time to soak the nuts!

For Filling:


1/2 cup clementine juice (orange would work fine too)
1/2 cup date paste (soft medjool dates mixed with enough water to form a paste)

1/4 cup dried cherries, chopped (can use dried currants)
1/4 cup dried apricots, chopped
1/4 cup raisins
1/4 cup golden raisins
2 small apples diced
1 1/2 tsp Pumpkin Pie spice
pinch of sea salt
1 tsp clementine zest minced (or orange)
1/4 cup agave nectar

Mix all but the apples and raisins in a food processor until well combined. Add in the raisins and apples and pulse a few times until coarsely ground. Taste for sweetness.

You can let the filling marinate in a closed container in the fridge if you like. It gets better with time. Once ready, spoon into crust and chill, while you make the topping. Or use this as a topping for raw ice cream or with the cashew cream alone- no crust required.

Cashew Cream Topping:

1 1/2 cup cashews, soaked at least 20 minutes.
1/2 cup water
1/4 cup agave
3 Tbsp coconut oil
1 Tbsp lemon juice
pinch of salt

Blend all ingredients in high speed blender until creamy. Chill before serving.

printer friendly copy


Since it was his birthday- he had his second piece with cool whip but honestly I think the cashew cream is better!


The verdict? He says it's better than any store bought pie - even though it's raw!


I know this will be a new tradition in our house now! 


I hope you enjoy!


Monday, December 26, 2011

Raspberry Bars

Raw Raspberry Bars

Greetings everyone and I hope you all are enjoying the holiday season!

We had a lovely Christmas and I have to admit it included quite a bit of cooked food. I have actually started helping my elderly neighbors with some things and one of those has been meals. Although one of them eats quite a bit of raw food as in fruit and salads, which probably explains why she is so sprite at 83! the other is a big meat and potatoes guy who really misses being able to cook. She doesn't cook and his health is challenged. So it's been interesting.

We actually joined them for a Christmas Eve dinner that I prepared and while they both loved it, and it was one of Rich's all time favorite foods, we realized we can no longer eat this way and feel good. I stayed pretty much to my vegetable dishes, which surprisingly they also really loved but the whole process was a reminder of what all cooking entails. Its' a lot of work, ingredients and clean up. I have really come to appreciate raw food clean up because it's a snap! Not to mention the way cooked food makes us both feel- heavy, congested, sleepy, etc...

Plus I don't feel right preparing meat anymore. It's not appetizing to me and frankly I feel very uncomfortable working with it. Just being honest here because it surprised me more than I expected. My kitchen no longer feels clean to me from having meat in it, even though it was of course cleaned up. 

Rich said to me as we left their home Christmas Eve, "Can get back to raw? I need it."
You don't know what a surprise this is to hear. He was the last person I expected would like raw food. We both agree that simper is better, instead of the complicated raw dishes.

With that said, after all the baking I did the last couple of weeks, I was really craving a raw treat. Since Rich loves raspberry I made up these simple raw raspberry bars. No cooking, easy clean up and they seem to get better everyday. Plus I love the color! 

The color of raw fresh foods is so beautiful! When I see a colorful plate of pure fresh food, there is no question in my mind that this is how we are supposed to eat. It is so tantalizing!!

So enough rambling. On to the...

Raw Raspberry Bars

For crust and topping:
2 cups shredded coconut
1/2 cup cashews
1/4 tsp salt
1/4 cup agave

Process coconut, cashews and salt in a food processor until fine and crummy, then add in the agave until well mixed.

Press the 2/3 mixture into a pan that has been lined with cling wrap. Make it thick enough that it will hold up as a cookie base when done. I used a 8 X 9 glass dish. You can also press into tart or small muffin tins, line first though with cling wrap.

Refrigerate while making the jam.

Raspberry Jam

1 10 oz package of frozen raspberries thawed and drained or 1 carton fresh berries
3 TBSP date paste (medjool dates mixed with enough water to form a paste)
1/4 cup agave syrup or sweeten to taste.


Blend in small blender , a Magic Bullet is perfect but a regular blender will work as well, until nicely chopped and mixed. Taste for sweetness and add more agave if necessary.

Once the bottom crust is set, pour the jam over and spread. Best to let this set up in the fridge before adding top layer. I didn't wait and pressed out little balls and layered over the top to keep it floating on top of the jam (because it wasn't set yet) but you could just sprinkle the crumb topping over as well.

Best to let the whole thing sit a couple of hours in the fridge covered to set up. Then cut and use plastic wrap to help you get it out of the pan in one piece.

I think they tasted better the next day and the next....
Should keep for 5 days covered in the fridge, if they last that long.
Hope you try the recipe and enjoy!


Thursday, November 24, 2011

Mystery Melons

Mixed Melon Bowl

We are fortunate to have a local certified Farmer's Market that provides fresh produce and food every Sunday, fall through spring. We live in the desert so unlike other places that get this privilege through the summer, it's just too hot for them to come our way.  

One of the best things about this market is the samples. They always have samples to test the fruit and I am always surprised to discover new tasty treats. 

Last week I discovered these little beauties and although they had them marked as "melon and papaya," I was not able to get the actual names. I figured I could look them up online but after much searching, I was disappointed. I can't identify them.  Maybe someone reading this knows their names?  I'll also try to ask again at the market this weekend. The sellers were asian so perhaps they are a type of asian melons? 


Whatever they are called they are delicious!!!


This melon is about the size of a soft ball.
It's very sweet. Sort of like a sweeter version of a honeydew. 

This one they called a papaya.
It tastes like a melon with almost a slight flavor of a cucumber. Very mild.


We are also fortunate to have little watermelons around this fall so I thought the three of them would make a nice melody of flavors.


And I was right. 
 These three little melons made a really lovely Thanksgiving breakfast.

I hope this encourages you to break out of the usual and open up to the idea of trying something new. Even if you don't have a local farmer's market, I have learned that if you ask your produce person about something new and different, most will be happy to slice one open and let you sample it. 
There's a whole big produce world out there. Go explore!

This Thanksgiving I am especially thankful for the bounty that nature provides us
and for readers like you. 

Sunday, November 20, 2011

Getting Fruity

Pineapple, Kiwi, Banana "cup"
Getting Fruity Smoothie
It's been almost a full week now of me eating primarily fruit. To be honest it has been easier than I thought. I do drink them for the most part in smoothies and that is quite filling. I have tried making some more savory smoothies with more of the non sweet fruit like cucumbers and tomatoes but for now my body and taste buds seem to be craving the fruit more. With time I think I will be more ready for the other.

I have been researching the work of Dr. Robert Morse ND and watching his detox videos on Youtube (highly recommend!) and he is a big proponent of the fruit diet especially to heal. I feel like I've been learning so much! Don't get me wrong, I think if I could chew I would still be having a big salad for dinner as I do miss that but for right now I am enjoying my smoothies.

Right now pineapples are on special at our market and I am taking full advantage. Yes- they are picked green in Hawaii I imagine and that's not the best way to eat pineapple but truth be told,  they are delicious and since I can't get to Hawaii right now, I'm enjoying them here.

The above Pineapple cup just seemed like a pretty idea. I made it for Rich for breakfast this week and blended the same ingredients for me. Then of course he wanted mine. So I blended his as well. Go figure.

My other favorite smoothie with the pineapple is mango, pineapple, banana and greens. Yum! Matter of fact I think I'll go make one now!

Okay... so another great food I am finding to be delicious is Grapes!
Grapes are so nutritive and sustaining not to mention cleansing.  And oh! They are so easy to eat!

look at the size of these organic grapes!
Dr. Morse is such a fan of grapes that he puts his cancer patients on grape fasts. Up to 42 days at a time and experiences tumors actually disappearing.  Amazing!

There is actually an old publication all about the curative powers of grapes called The Grape Diet written in 192 by Johann Brandt.
I am assuming that's where Dr. Morse got his idea. It has been a natural healing method used in Europe for almost 100 years.


I'm not ready for a grape fast anytime soon but I do plan to continue to enjoy them and I look at them now with a whole new appreciation.


hammock time
This is my idea of how to rest and relax while getting some much needed fresh air.

A hammock, a good book on my Kindle, water, some fruit, the sound of the water fountain and of course my pooch by my side.

Her latest thing is that she wants to climb into the hammock with me but I prefer Lili to stay on the ground. It's too easy to bounce yourself onto the ground as it is.


Her snoring though can really put me to sleep!

Funny tidbit:
While we were out there (and after I put the camera away) a road runner skulked right behind her under the tree. Fortunately Lili never saw it. I think I would have been bounced to the ground for sure!


Lili snoring up a storm
Lili Von Shtupp in her pukas
That's it for today my friends. I hope this post reminds you that simple fruit can be a meal and is arguably our perfect fit as far as nutrition goes. I will also be sharing some of  low fat soup combinations I am working on but this week was just about enjoying the simplicity of fruit!

Toodles!

Monday, November 14, 2011

Spoons Over Forks


The Reason For My No-Chew Challenge

TMD/ TMJ Treatment

A couple months back I started a dental treatment program for severe TMJ or more accurately called TMD, which requires that I wear a dental device (a splint) 24 hrs a day. The point of the two devices, one for day and another for night is to keep my teeth from touching fully, so that the space between the skull and the jaw can heal, forming scar tissue that will replace my ruptured disc. The ultimate goal is to reposition my jaw completely and let it return to full function and range of motion. I did not know that my jaw was actually locked. I just knew I could not really open my mouth very wide and that there was a lot of popping and clicking when I tried to.

The TMJ- CFIDS/FMS Connection

I suffer from CFIDS/FMS, the full syndrome and not just the "muscle pain" that the word Fibromyalgia means. My chiropractor said there is a major connection between TMD (TMJ) and the nerve-causing pain that radiates down through the body and keeps my spine and pelvis out of alignment. They believe that the chronic fatigue is also caused by the misplacement of my jaw, which keeps my airway constricted, not allowing for full oxygen to reach the brain and never allowing me full deep restorative sleep. I had not even noticed that I had stopped dreaming (REM sleep) altogether. The constant body pain also keeps me moving and waking through the night. I have been tested for sleep apnea and was cleared but there are many with apnea that would be helped by this night splint as well. The C-Pap is just a bandaid approach when it could be a misaligned jaw. (I'd choose sleeping with the night splint over a C-pap any day.) And just to clarify, most of the night guards that people wear for teeth grinding is not the same thing. Your jaw is still active as you can still grind those, you are just grinding plastic instead.

My chiropractor assured me he works with a dentist that has had much success with treating TMD and reversing fibromyalgia.  Patients even come to see him for treatment from other states. After the results from my initial testing, being desperate for relief, I was up for anything and agreed to the 9-12 months treatment.

So part of the challenge of this program is the "no-chew"diet. I really can't chew with the device in place and of all times, while eating is the most important time to have it in.  They tell me even one hour without the splint in place is equal to a whole day of treatment lost.  I thought it would be a snap seeing how I really like green smoothies but it turned out to be more of a challenge mentally. I started experiencing hypoglycemic episodes and out of fear gravitated towards cooked soft foods, which has just brought up other health issues.

Blood Sugar Imbalances and Dietary Fat Connection


In an attempt to try to understand my hypoglycemic episodes, I was researching blood sugar imbalances and came across Dr. Doug Graham's explanation about how he believes fat is the cause of blood sugar swings, not sugar. He even goes on to explain what he believes is the cause for the Chronic Fatigue epidemic, not to mention Diabetes. I'll give you a clue- dietary fat and it all makes good sense, especially as I think about people that have had amazing health improvements from juicing. I never did well with juicing but probably because I never fully did it while not eating fat as well.

So after a soul to soul with myself, I decided to give this low fat raw angle a try and to take it even one more step and recommit to the liquid based diet idea. It will not only help with my dental treatment but also if I stay with low fat options, will go along way towards restoring my health.

So that is my new direction: Low Fat Raw Vegan but in a liquids only format.


What this means for the blog:


My eating will be a lot more simple, which has always been my goal. I will be focusing more on the beauty of fruits and veggies in close to their natural state. Recipes or more accurately combos will be very simple and most likely liquid in form although Rich is still able to chew and I will share what I make for him as well. I hope you stay tuned. There are actually not a lot of blogs out there that focus predominantly on low fat vegan and even fewer on the liquid side of this. I'm also going to keep a daily journal for accountability and reflection.

As for the TMD treatment,

I have to say within 2 weeks my jaw started responding with my range of motion improving 100-150%!! I also started dreaming within days. So that's all good and exciting. The sleep has still been sporadic with a whole couple of weeks keeping me up all night and asleep most of the day but I think that will work itself out. Keep your fingers crossed.

Wednesday, November 9, 2011

Red Pepper Bisque Soup and Spicy Cheez- itzs!


More favorite recipes!

I realize I am saying that quite a bit. I honestly didn't know I had so many favorites!
But these two are  hands down winners- for sure!

This soup was one of my first raw soup go- to recipes and a huge hit in my house! It was shared by my friend, Wendy Campbell from www.myrawendeavors.com. It is so flavor full and delicious and super easy! I might have changed it a smidgen since the original but we love it!!

And need I remind you the best thing about raw soups? They take only minutes, no cooking and the clean up is as easy as blending a little soap in your blender. No pots and pans- no muss no fuss!


Fast and easy!

And the Cheez-itzs? Well, Super Good! I don't make them all that often because they disappear so quickly. Sometimes within hours!! They are more like a special treat. They are a dehydrator food recipe and are a nut based and not a flax based cracker but so worth sharing!

Red Pepper Bisque Soup

Raw Red Pepper Bisque Soup
This recipe is especially easy because you don't even need your knife or cutting board! Just a few measuring spoons and cups and your hands and a blender of course and clean up is a snap!

Almond Butter, Nutritional Yeast, Sun-dried Tomatoes, EVOO, Red Pepper, Garlic, and Salt
Ingredients:

1 cup sun-dried tomatoes, soak in water until softened and reserve the soak water
1 large bell pepper, cored and seeded
1 clove of garlic
1/4 cup extra virgin olive oil
1/4 almond butter
1 TBSp nutritional Yeast
1/2 tsp salt

Blend all ingredients in a high speed blender. 

It comes out quite thick. Add soak water to desired consistancy. I usually use one cup of soak water and at least another cup of hot water to bring the temperature up when I'm ready to eat.  It makes about one quart.

Tip: Before adding more water, I usually pour off about half the "thick mix" into a jar for later and then add the hot water for what I am about to eat. I store the "thick mix" as a concentrate in the fridge and then before eating add in hot water, put the top back on and shake to mix. This works out really well with raw soups to have leftovers without diluting it too much.

Although Wendy says she also makes this without the oil and nut butter, I have yet to try this but it sounds good!
Raw Spicy Cheez-itzs!!

The Raw Cracker Barrel
Another easy dehydrator cracker that is a no fail hit. Even my 80 year old neighbor who basically eats all her meals from packages, loves these. Hmmm... probably doesn't sound like the best taste tester but I think you get the picture of their universal appeal.

This recipe has been around the web and too many to name have been involved with its' metamorphosis to be sure who to really credit. So if this is your final recipe, I humbly thank you for sharing.

Almonds, Sun Flower Seeds, Brazil Nuts, Ground Flax Red Pepper, Tomato, Spices
Ingredients:

1 cup sunflower seeds (soaked and dehydrated if you have planned ahead)
1 cup brazil nuts
1 cup almonds
1 big tomato
1 red pepper, cored
1/4 cup ground golden flax seeds
1 Tbsp chili powder
1 tsp cumin
1 tsp onion powder
1 tsp garlic powder
2 tsp salt or to taste

Process all until well mixed and a coarse texture. Spread onto a Teflex sheet as thin as you like.
cheez-itzs spread onto tray about 1/4 inch

Set in dehydrator at 115 degrees. After a few hours, score with a butter knife and leave until dry on the top, then flip onto a screened dehydrator sheet and leave until crispy- usually all day. 

Raw Spicy Cheez-itzs Crackers


Now watch how fast they disappear!


Printer friendly recipe


Monday, November 7, 2011

Ba-Bye BLT

There's a New Kid on the Sandwich Board!


Say Hello to O.S.T.A.
(Onion Bread, Sprouts, Tomato, Avocado)

Yep that's right, O.S.T.A. as in Asta la Vista Baby! Bye- bye B.L.T. 
There is a new go-to favorite in town!

No unhealthy bacon or questionable bread ingredients and with the avocado, no mayo required. With the onions, the bread has lots of flavor and in this case since we are using Heirloom tomatoes, the tomatoes do too!

I hear you saying, sure it's colorful and healthy but how does it taste? 
Well, as an example, if I have the ingredients in the house, R, the former high protein (aka meat) eater will actually make this for himself and eat it on a daily basis and even sometimes for a snack! 
I know! Total Shocker! 

So while you can make this tasty temptation with a bread (preferably sprouted bread) from the market, this post is all about the bread, The Onion Bread!

It is a dehydrator bread and while I know many people do not have dehydrators, for those that do this is a beginner recipe or better yet, an easy staple! This is Getting Raw remember? Not Gone Raw.

New to Dehydrators?

When I was new to raw, I ran out and got every new gadget to start my new "way of life," including one of these. It was an investment but by the time I got around to getting a dehydrator I had already been through the hassle of replacing several of my cheaper appliances to upgrade. I didn't want to do that here. So I bit the bullet and bought the 9 tray Excalibur. (the why's of this are another post entirely.)

So I was even more upset when the dehydrator recipes I tried turned into expensive garbage. Oh yeah! That went over well!

Dehydrators are tricky!!

It is not like baking, which I can do. I had no idea what things were supposed to look like, wet or dry, how long to leave it, how crispy or crunchy- no frame of reference at all. Plus I think I was overwhelmed by recipes that included dehydrator food that you had to start days before. Who can do that? Not Simple Raw recipes for sure. So I kind of gave up, a little, okay a lot!! Every time I look at that machine I feel badly. The expense!! Ugh!

So now with fall here and wanting a little heartier food, I decided to dust off the machine and get back at it. Before I gave up, I did have some successes and even favorites that came out well repeatedly. So that is what I'm sharing with you here today- a tried and true recipe that aside from drying time is easy and quick to make and can become a staple for sandwiches.

Onion Bread

Finished Onion Bread
This bread is really tasty and can be made both as a cracker, a little thinner and crispier, or as a bread as shown here. Also you can make it with larger onion slices that stay visible. The choice is yours.

Sunflower Seeds, Flax Seeds, Onions, Olive Oi, Nama Shoyu

Ingredients:

2 1/2 lbs sweet onions, peeled and quartered
1 cup sunflower seeds
1 cup flax seeds
1/2 cup olive oil
3 oz Nama Shoyu or Tamari

Grind seeds in a dry ingredient  type blender or grinder, a little at a time until you get 1 cup of ground seeds each. You want it coarsely ground, not flour but nut butter either.
Coarsely Ground Seeds
Place the seeds in a large bowl. Process onions as desired in food processor. Mine works best with half at a time. You want the onion pieces small, although mine border on mush.

Processed Onions
Mix with the seeds and the other ingredients until well combined. The flax will absorb the liquid.

Mixed Batter
Smooth onto non-stick Teflex sheets. An off-handed spatula works best for this. Spread about 1/4 inch thick. Mine covered about 1 and 3/4 sheets and next time I may make even thicker.

Onion Bread on Teflex Sheet

Dehydrate at 115 degrees for 3 hrs or until slightly tacky to touch. Remove trays from dehydrator and score into bread slices with a butter knife and return to dehydrator.

Here's the part that I can't tell you. Each area will have different drying times by weather, temperature, altitude, individual onions, etc. All things make a difference. 

What you are looking for with first drying time is to be able to peel the Teflex from the bread without it sticking too much. 

Once you get to this point, go ahead and place a new screen tray upside down on the bread and flip over. Remove the other tray and peel off the Teflex, placing the bread directly on the screen sheet. This will make drying time much faster now.

(Sorry no picture as I did this outside in the dark.)

Watch it for another 3-4 hrs. At this point you can carefully fold the slices until they break apart and if still not dry enough, replace them on the sheet and back in the dehydrator. You don't want the bread wet but how crisp you want it is up to you. I stopped when the bread would still bend a little on it's own and when it passed the taste test.

This is what leads to the "vanishing syndrome" with dehydrators. It encourages nibbling out of the machine. If you have others in the house, don't be surprised if there is not much left by the time it's done.
Finished Bread- notice the slight bend still at overhang

Once finished, store in the fridge for moister bread or an air tight canister for crackers.

Notes:

I turn the dehydrator off at night and resume when I wake up, so I can keep and eye on the doneness during the day. 

If it gets too dry you can always spritz with water to rehydrate, just not too much.


Another look at O.S.T.A.

THE Raw Sandwich


Sliced Avocado, an Heirloom Tomato (this is actually almost yellow-orange) and Micro Greens

Hope you give it a try!

What kind of sandwiches do you make now??


Sunday, October 30, 2011

More Treats

Chocolate Brownie Bites

Brownie bites, brownies, fudge, truffles, monkey balls- (oh yeah- more on that below) whatever you call them, these little beauties are a staple for going raw. It's usually one of the first things you learn to make for pure chocolate survival. You can make them into brownie squares or even a cake if you like but I like to roll them into balls, dust with a coating of something and then I pop them into the freezer, with the hopes that they will last longer. They really don't make it very long around here though, despite my attempts.

Don't be too concerned about the amount of nuts you see as when portioned into these bites you are getting very little at once. Unlike regular brownie bites, one of the great things about these is that they are so rich and filling you can't really eat too many at one time. One is usually all I can do.

Another great thing is that they take literally no time to make and of course are just full of great ingredients.

Eat them as treats, or little protein snacks to boost your brain power (You don't think walnuts look like brains by coincidence do you?) They make good treats to take with you for energy as well. It's all good.

The ones I roll in coconut R. has renamed "Monkey Balls" and they are his favorite and no, he is not a child. Even though he swears he is not a "sweets person,' he makes these disappear pretty fast. That "one" I mentioned before is usually all I get out of the batch.

So in the spirit of Halloween I am going with "Monkey Balls" and have added a little raspberry coulis for drama.

Monkey Balls

Brownie Bites Recipe

3 cups walnuts (un-soaked)
2/3 cup raw cacao, unsweetened cocoa
20 dates (you may want to soak in some water to soften for a few minutes)
1 tsp vanilla
1/4 tsp seas salt

Coating Options:


Coconut, unsweetened and shredded
Almonds, chopped
Hemp seeds
More cacao or cocoa or even carob

Blend the nuts briefly in a food processor. You want it coarsely chopped (Be careful to not over blend as walnuts become oily and can quickly become walnut butter.)
Add in the dates and pulse until will combined. Add the the rest of the items and blend until it starts to ball. Press between your fingers and if it holds, you are good. You may need a drop or two of water to get the right consistency- crumbly but sticky like dough.

5  Ingredient Brownies
When it all sticks pretty well then you can start to roll into bite-sized balls. I do the rolling all at once then put out dishes with toppings and roll them in those.


Assembly
OR Don't roll in anything at all. Your choice.

They will keep for a few days in the fridge or a couple of weeks in the freezer. So they say.

Tip: I reuse the container the dates came in to freeze the balls in. That way they don't get crushed.

Printer friendly recipe

Raspberry Coulis


1 cup of raspberries, fresh or thawed
agave or soaked dates to taste

I just blend this up in a small blender or Magic Bullet and add in the dates or agave to sweeten to taste. You can strain out the seeds if you wish.

Besides the look of blood for Halloween, raspberries and chocolate are a favorite!


Saturday, October 29, 2011

Halloween Treats!


Apple Butternut Squash Soup and Caramel Almond Apples
It's a few days before Halloween here in the states and I don't know about you all but I find myself thinking of treats. Back in my early trick or treating days, the worst thing that could happen was someone giving you an apple. Anyone else remember those people? or am I just dating myself here?

It was just around that time that my dad, who was an ER doctor said he would be taking our candy to the hospital to have it x-rayed before we could eat any- talk about scary! and NO apples! Fine with us- the no-apple part but then apple-giving fell out of favor about that time anyway.

Until recently I have been luke warm about apples. I know they are really good for us, "An apple a day..." and all that but mehh... just not that interested. Was I traumatized by Halloween? and look what happened to Snow White!  All I know is that apples were never very exciting and one of my last picks out of the fruit line up.

Honey Crisp Apples
That is until I came across the Honey Crisp apple.
This little gem is new in town, literally it's only been around for about 5 years and came from the University of Michigan. It's sweet and tart and when you bite into it a piece snaps off in your mouth, hence the name "crisp."

If you haven't tried this yet, it may just get you excited about apples again- like me. They are a little more money that the other apples you see in the store and I think this is why more people haven't been hooked in yet but once you try them, you'll see that it's worth grabbing them while you can. They are only around for a limited time in the fall.

So with my Honey Crisps in the house I made a couple of recipes that I think everyone will like.

Caramel and Almond Apples

These are wonderful and you don't have to worry about all the chemicals and processed sugar in the store bought caramels or caramel apples.

Wholesome Treat Ingredients

Caramel Recipe:
1 cup dates (soaked in water to soften)
14- 1/2 cup almond milk
1 tsp coconut oil
1 tsp vanilla
dash sea salt

Starting with the 1/4 cup almond milk, blend all until smooth in a food processor or blender, stopping ever so often to scrape down the sides.  Add more milk if needed but you don't want it to be runny. Mixture should be smooth.
You can enjoy this as is as a dip or proceed to dress the apples on a stick.

Other ingredients:
Almonds or other choice of nut, coarsely chopped
Apple
popsicle sticks

Plunge a popsicle stick into the apple of your choice at the stem area.  Frost the apple with the caramel paste. Place the nuts in a shallow bowl and press the apple into the nuts until it sticks in the paste. 

That's it! So easy!

Printer Friendly Recipe link

Apple Butternut Squash Soup
This soup is delicious!

It's made from fresh ingredients, in your blender- so simple and if you like go ahead and heat it gently on the stove. Remember to heat only until it's too hot to your finger, this means it also won't burn your tongue but more importantly it keeps all the nutrition in the food and keeps it raw.

Apple Butternut Squash Soup Ingredients
Recipe:
4 cups Butternut Squash (2/3 of one medium sized), peeled seeded and chopped.
1 young Thai coconut- meat and water (need a refresher on how to open these?)
1 apple peeled and cored, coarsely chopped 
1 cup diced carrots, I used baby carrots as that's what I had
4 dates, pitted and stemmed.
juice of 4 oranges
juice of 1/2 lemon
1/2  shallot, peeled
1 cup cashews, soaked in water
1 Tbsp curry powder
1 Tbsp cinnamon
1 tsp sea salt
Pumpkin seeds for garnish

Go ahead and put the cashews in enough water to cover while you get all else prepped. When ready to use, just drain off water.
Peel and chop the squash making sure to remove the peel down to the orange- past the yellow or if you want even faster prep take advantage of the butternut squash you can buy in cubes (Trader Joe's for one does this.) I put the squash in a giant bowl and covered with water while I prepped the rest. Some say it removes the starchiness from the squash.

Put coconut water in first and then other ingredients, with the squash being last. You may need to hold off putting in all the squash until it blends down a little bit. Blend until desired consistency. 

Note: If you don't have a high speed blender, you may need to do this in small batches to get it well blended.

Also if you are not a big curry fan ( like me) , don't worry as this flavor is really subtle. If still not sure add a little in at a time and taste.

For spider web topping:
I used half the cashews separately to make the spider web topping. If you don't want to do this go ahead and add all of them into the blender with the other ingredients.

In a small blender (magic bullet) I added the cashews and 1 Tbsp of water at a time and kept blending until I got a thick creamy consistancy. You want it thin enough to draw but not too runny. Then I put it in a ziplock bag, removed the air and clipped a small section of the corner to draw a spiral on the soup top. Finish by dragging a toothpick through the spiral from middle out.
Before eating just blend it all in.
Hope you give these a try and let me know how it goes.

Happy Halloween!


Wednesday, September 7, 2011

Thai Carrot Soup

Delicious Raw Thai Carrot Soup

You can eat it cold, warm or even if you make it hot, you will enjoy the simplicity and taste of this lovely soup! It's carroty, and creamy with a little kick and very filling.

It's Time

I don't know about you all, but I can tell summer is coming to a close. We are still in the triple digits here in the California desert and will be for a while still so it's not like it's getting cooler yet but the day before Labor Day just felt a little different.  It was still hot and sunny but change was in the air. In the days following we had some rare showers and even a thunder storm. Although we didn't cool down much and it didn't last long, it was kind of fun to get wet and have a bit of relief from the ever present sunshine. I know you are thinking well, duh! A storm was coming, of course it felt different. But now the storm is gone and that feeling is still in the air and sky.

This signal of seasons makes me a little sad for the wonderful summer fruit and produce that will be left behind but at the same time, it brings new options and I can't wait to be able to actually spend more time outdoors. I know for many of you that sounds the opposite of your summer experience but we are just coming into our "season" here. People from all over will be heading our way to soak up our warm sunshine- warm as opposed to hot! and sunny skies. The desert becomes a playground again and I hope to be able to get out and play too this season.

Our local Organic Farmer's Market is just about to re-open- Woo-hoo! Can't wait! It closes from May until mid September and it always leaves a major void. So this is an exciting time! I love learning about where our food comes from, the people behind it and trying new things. This year I want to push my comfort zone even further and try as many new things as possible.

So in honor of the change in season, I thought one of my favorite soups was in order. When I was brand new to raw, and looking for what to try that was good, my friend Deborah Blank shared this recipe with me. It was instantly one of my favorites and still is today. I believe Penni Shelton, the director of RawFood Rehab.com is the originator of this version of the recipe.

Thai Carrot Soup

Raw Thai Carrot Soup

What I love about raw food preparation is lining up all the ingredients (can you tell?) and looking at all the fresh and colorful ingredients and knowing that I am not going to do anything to them to destroy their nutrients. I know exactly what is going into my food and that I will get the full benefit of health and wonderful fresh taste in a meal. Being easy, only a knife and blender required and no cooking time or major clean up is all just a bonus!

Thai Carrot Soup Ingredients
3 carrots, topped and tailed
1 orange bell pepper
2 cups spring water 
meat from one young/thai coconut
3/4 cup almond milk
1 Tbsp Nama Shoyu or Tamari
1 Tbsp agave
1 Tbsp curry powder
1 Tbsp chopped cilantro
1/2 jalepeno pepper
2 tsp sea salt
chives for garnish

Chop all vegetables except for the chives, into smallish pieces, 
Blend with other ingredients until smooth. 

Tip: the water is where you can control the temperature of your soup.
 Add room temperature water for room temp soup 
If you want it warm or even hot, heat your water before adding to the blender.

What to do with the coconut water? Drink it! Or make a smoothie with it as a base- so good!

Printer Friendly Recipe

Now if you are new to Young Coconuts, Don't Be Intimidated!  

When I was new to raw, I skipped over any recipes that included these coconuts and when I finally tried to open one I was surprised how easy it was. For more info and a really good video on how to open them check out my post Cuckoo for Coconuts.

The hard part is finding where to buy them, usually your health food stores or  asian markets but they are popping up more places. I was surprised to find them in my regular Vons grocery store. Just shake to make sure you can't hear the water. Most of these retailers don't know when they turn bad to pull them from the shelf.

Now, I would love to be able to share a substitute for young coconuts for those of you that don't have access to them but since this recipe already has almond milk in it, I am not sure what would work in it's place. Meat from mature brown coconuts does not work, I'm afraid.
If YOU have any ideas on a substitution, please share in the comments below.


Cilantro Head
What are you looking forward to with the change of season?


ShareThis

Related Posts Plugin for WordPress, Blogger...